Multitrack Recorder and Access Point for Behringer XR18
Preface
This started as a plain multitrack recorder on a Raspberry PI 4B (RPi) in a case with a 3.5„ touchscreen. The software used for recording as well as playback for virtual soundchecks is Z-LiveRec by Anders Gronlund.

After successfully using it at rehearsal and some live concerts, I found the setup not to be convenient. Operating some of the small controls on the small RPi touchscreen was not easy. Also the RPi had to be placed at my drums where where free space for it was sparse, and the USB cable from the mixer had also to be quite long.
So I decided to make a headless RPi box which could be placed near the XR18 with a short USB cable. Operating Z-LiveRec could be done on the android tablet which I have anyways for the Mixing Station app. For Z-LiveRec I could use VNC. This is how it finally looks:

The XR18 has the RPi attached at the left side with klett stripes, an the access point to the right. I can easy switch between Z-LiveRec and Mixing Station by swiping (swipe down from top and select the other app). Both apps keep running all time.

As a bonus I can also operate Z-LiveRec from the tablet when moving around the audience area during virtual soundcheck.
I also played with a configuration where the RPi would act as both, the recording device as well as the access point (AP).
I used RaspAP which was easy to set up and basically works. However the built-in WLAN in RPi does not have a good reach, especially in the metal case and with the 5GHz frequency range (I got about 8 meters reliable distance outdoor).
Therefore I added an external USB WLAN Adapter (Alfa AWUS036ACM) which solved the reach problem. This solution works, however reach of the external USB adapter was not much better that the T-Link AP that I used before. The stuff was not really reduced with the adapter, and it even seemed mechanically less robust around the mixer where lots of cables and other stuff living.
Thats why I finally use RPi only for recording, and the dedicated TP-Link AP.
Configuration
- Behringer XR18 Mixer
- TP-Link WR902AC Access Point
- Raspberry PI 4B/8GB with metal case and power supply
- Micro SDXC card (SanDisk Ultra 64GB)
- USB3 memory stick for recording (SanDisk SDCZ810 128GB)
- Android tablet (HUAWEI MediaPad M5 lite 10)
For setup only:
- Windows 10 PC
- USB micro SDXC card adapter
Setup SD Card and first boot
- Insert SD card to PC
- Download the Raspberry PI Imager to the PC
- Install raspberry pi imager, accept permission
- Run the raspberry pi installer, accept permission
- Select raspberry pi OS (32 bit bullseye)
- Select SD card
- Click settings symbol (gear)
- Set hostname as desired (accu-raspi)
- Enable SSH
- Auth by public key
- Paste your public key into „authorized_keys for pi“
- Set username and password as desired
- Enable WiFi
- Select SSID and enter password
- Select US as WiFi country (important for 802.11ac 5GHz)
- Select time zone and keyboard layout as desired
- Save
- Write
- Confirm delete of old content
- Insert SD card to RPi and boot
System Setup
If all went well so far RPi is running and connected to your WLAN. At this time you don't know the IP, but if you have luck you can just SSH to the hostname that you defined in the imager. If that does not work, you must figure out the IP to make the connection.
One option is to find the IP is in the device list of your router. Another option is the „Net Analyzer“ app which you can install on your tablet (or mobile) from the google play store. I highly recommend to have it on your mixing tablet since it is very convenient.
After successful connecting with SSH from the PC, I recommend these steps:
sudo raspi-config
In raspi-config, check and correct System Options/Hostname in case you were yet unable to connect by hostname. Next in Interface Options enable VNC access. Then exit and allow raspi-config to reboot (or use sudo reboot in case).
After reboot SSH should basically be able to connect with the hostname.
For the GUI install RealVNC on your PC and on your tablet.
Now you have a SSH session and can also use the GUI desktop of RPi.
Next I recommend to update the system:
sudo apt-get update
sudo apt get upgrade
sudo reboot
The system is then ready to install the Z-LiveRec recording software and the RaspAP access point software.
Install Z-LiveRec
Download the software from z-liverec.com. There is a free trial version available if you just want to try it out first.
The full installation instructions are in the manual of Z-LiveRec.
Here is a shortcut for Version 2.25 (other versions may vary):
sudo apt-get install sox libsox-fmt-mp3
sudo apt-get install exfat-fuse
sudo apt-get install exfat-utils
unzip Downloads/Z-LiveRecV225-1s3iyz.zip
chmod u+x Z-LiveRec
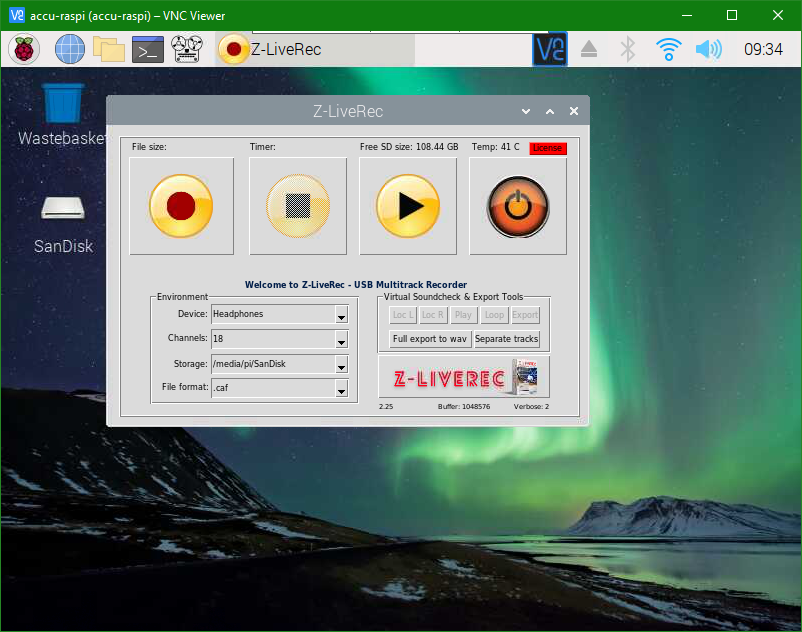
Now you should be able to see Z-LiveRec in the file manager in the VNC session, and can start it from there.
I am not going throug the usage of Z-LiveRec, that is all explained very well in the manual.
You can configure Z-LiveRec to start automatically, however you might also want to have an icon in the menu and the taskbar. Here is what I did (not being a RPi expert, maybe there are other ways):
- Use the main menu editor (in menu - preferences) to add Z-LiveRec to the main menu (I put it in the top level)
- Optional
- Find a nice icon and attach it in the menu by right clicking the L-LiveRec item, then properties and then clicking on the picture to use.
- Right click in the taskbar
- Add/remove panel items
- Application launch bar
- Preferences
- Find Z-LiveRec (maybe under „other“)
- Add

Change VNC Resolution
You might want to choose a smaller resolution for live operation, so Z-LiveRec is filling the window better.
- Menu
- Preferences
- Raspberry pi configuration
- Display
- Headless resolution
After reboot you have the new resolution in VNC sessions.